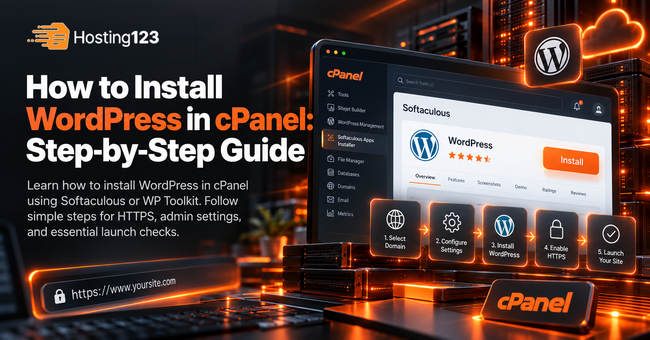
To install WordPress in cPanel, sign in to your hosting account and open Softaculous or WP Toolkit. Select your domain, choose HTTPS, and set your administrator credentials. Then run the installer and check your website. Hosting123’s WordPress hosting provides cPanel and WordPress management tools to help you get started.
This guide explains both installation methods. You will also learn how to choose the correct folder, avoid common mistakes, and prepare your new website for visitors.
What Do You Need Before Installing WordPress?
You need an active hosting account, cPanel access, and a domain connected to your hosting. For an HTTPS installation, your domain also needs a valid SSL certificate. Finally, check the installation folder before starting. A new installation could overwrite files from an existing website.
Use this checklist before you continue:
| Requirement | What to check |
|---|---|
| Hosting account | Your plan supports WordPress and has available storage and database capacity. |
| cPanel access | You can sign in through your provider’s approved login link. |
| Domain connection | Your domain points to the correct hosting server. |
| SSL certificate | Your chosen domain opens over HTTPS without a certificate warning. |
| Installation location | You have selected the correct domain and folder. |
| Administrator email | You can access the inbox for account notifications and password resets. |
Already have a website? Back up its files and database before making changes. If you want to move that website, use a migration process rather than installing a blank replacement.
Which WordPress Installer Should You Use in cPanel?
Use the installer your hosting provider enables. Softaculous and WP Toolkit both offer guided WordPress installation. However, they use different menus and settings. Search for either tool in cPanel, then follow the matching instructions below. You do not need to use both.
Some accounts display WordPress Manager by Softaculous. Others show WP Toolkit under the Domains section. The available tools depend on your provider’s configuration. cPanel documents WP Toolkit as one supported installation method.
How Do You Install WordPress Using Softaculous?
Open Softaculous in cPanel and select WordPress. Next, choose the installation URL, enter your site details, and create an administrator account. Review the optional settings before clicking Install. Softaculous handles the WordPress files and database setup as part of the installation process.
Step 1: Sign In to cPanel
Use the cPanel login link from your hosting provider or customer account.
Your cPanel credentials may differ from your customer account password. Therefore, check your hosting welcome message if you cannot sign in.
Step 2: Find the WordPress Installer
Use cPanel’s search field to find Softaculous or WordPress Manager by Softaculous.
Open the tool, choose WordPress, and select Install or Install Now. Button labels may vary between versions.
Step 3: Choose Your Domain and HTTPS
Select the domain where you want your website to appear.
Choose the HTTPS version only after confirming that its SSL certificate works. For example, use https://example.com for a website without the www prefix.
If you prefer www.example.com, check that both its DNS configuration and certificate support that hostname.
Step 4: Check the Installation Directory
The directory field controls the address of your WordPress installation.
| Desired website address | Directory field |
|---|---|
https://example.com/ | Leave empty |
https://example.com/blog/ | Enter blog |
https://example.com/shop/ | Enter shop |
For a website at your main domain, leave In Directory empty. Otherwise, a value such as wp places the website at example.com/wp/.
Also, confirm that the destination does not contain an existing website.
Step 5: Enter Your Website Details
Add your site name and a short description.
For example:
- Site name: Green Studio
- Site description: Interior design ideas for everyday spaces
You can change these details later in WordPress. Leave multisite disabled unless your project specifically requires a WordPress network.
Step 6: Create Your Administrator Account
Choose a distinctive username and a strong, unique password. Then enter an email address you can access.
Save your credentials in a password manager. Avoid sending passwords through ordinary email or including them in screenshots.
Step 7: Review Optional Settings and Install
Review the language, plugin selections, database options, and available update settings.
Start with the plugins you actually need. You can add others after checking your website.
Finally, confirm the domain, HTTPS address, and directory. Click Install and wait for the completion screen. Save the website and administrator URLs.
How Do You Install WordPress Using WP Toolkit?
Open WP Toolkit in cPanel and click Install. Choose your domain and installation path, then enter the website title and administrator details. Review the database and update settings before confirming. After installation, open your website and sign in to check that everything works.
Step 1: Open WP Toolkit
Search for WP Toolkit in cPanel. Depending on your layout, you may also find it under Domains.
Click Install to open the installation form.
Step 2: Select the Installation Location
Choose your domain and preferred HTTPS address.
For a website at example.com, select the domain root. For a separate blog at example.com/blog, use the blog subdirectory.
Check the full destination address before continuing.
Step 3: Configure Your Website
Enter your website title and choose the site language.
Next, select the latest stable WordPress version available through the installer. Review any optional theme or plugin set before accepting it.
Step 4: Add Administrator Credentials
Enter your administrator username, password, and contact email.
Use credentials that differ from your cPanel login. This keeps the two accounts separate.
Step 5: Review the Database Settings
WP Toolkit offers database name, database user, password, and table prefix settings.
For a new installation, its generated values are usually suitable. Keep the database credentials separate from your WordPress administrator credentials.
Step 6: Complete the Installation
Review your choices and click Install.
Afterward, open the public website and test your WordPress login. WP Toolkit also provides management options for the installation.
Can You Install WordPress in cPanel Without an Installer?
Yes. You can upload WordPress through File Manager and create its database through cPanel. Then open the website address to run WordPress setup. This method requires more manual work, including connecting the correct database user and entering the database credentials accurately.
Follow these steps:
- Download WordPress from WordPress.org.
- In cPanel, open Domains and identify your domain’s document root.
- Upload and extract the WordPress ZIP file through File Manager.
- Put the contents of the extracted
wordpressfolder in your intended installation directory. - Open Database Wizard or MySQL Database Wizard, depending on your cPanel version.
- Create a database and a separate database user.
- Assign that user to the database with the required privileges.
- Visit your installation address and enter the database details.
- Complete the site title, administrator account, and email fields.
For a root installation, WordPress files belong directly in the domain’s document root. Leaving them inside a nested wordpress folder changes the website address.
Use the database hostname your provider supplies. Do not assume that every hosting environment uses the same value.
What Should You Check After Installing WordPress?
Check the public website, HTTPS connection, and administrator login first. Then review your site settings, permalinks, backups, and updates. Before launch, test your main pages and forms. These checks help you catch setup problems before visitors encounter them.
Check Your Website and Login
Open your homepage in a private browser window.
Next, visit https://example.com/wp-admin/ and sign in. If you installed WordPress in a subdirectory, include that directory in the login address.
Review General Settings
In Settings → General, check:
- Site title and tagline.
- Administrator email.
- Time zone.
- WordPress and site addresses.
Confirm the correct HTTPS address. However, avoid changing the address fields casually, since an incorrect value can disrupt access.
Choose Your Permalinks
Open Settings → Permalinks.
For many blogs, Post name creates a clear URL structure. Choose a structure early and keep it consistent.
Prepare Backups and Updates
Confirm how your backup system works. Check what it includes, how long it retains copies, and how you would restore your website.
Also, review WordPress, theme, and plugin updates regularly. Keep a current backup before significant changes.
Review Search Visibility
Open Settings → Reading and check the search visibility option.
For a public website ready for launch, clear Discourage search engines from indexing this site. This setting does not guarantee indexing or control exactly when search engines visit.
For a private development website, use proper access protection. The search visibility checkbox does not prevent people from opening the site.
Why Is Your WordPress Installation Not Working?
Installation problems often involve the destination folder, domain connection, SSL certificate, or database configuration. Start with the specific error message. Then check the matching setting instead of repeatedly running the installer. Reinstalling can complicate the problem when files or database tables already exist.
| Problem | What to check first |
|---|---|
| Domain missing from the installer | Confirm that you added the domain to the correct cPanel account. |
Website opens at /wp/ | Review the directory you selected during installation. |
| SSL warning | Check certificate validity and coverage for the chosen hostname. |
| Existing files warning | Inspect the destination and back up its contents before proceeding. |
| Database connection error | Verify the database name, user, password, hostname, and user permissions. |
| Website shows an old page | Check DNS, the domain’s document root, and relevant caches. |
| Administrator login fails | Confirm the installation URL and use the password reset option if needed. |
If you contact support, share the error message and the step where it appeared. Remove passwords and other sensitive details from screenshots.
Frequently Asked Questions
Is WordPress Free to Install Through cPanel?
Yes. WordPress is free and open-source software. However, you still need hosting and a domain. Premium themes, plugins, and additional services may also involve separate charges.
Do I Need Coding Skills to Install WordPress?
No. Softaculous and WP Toolkit guide you through the installation. You mainly need to choose the correct domain, installation folder, and account details.
Should I Leave the Installation Directory Empty?
Yes, leave this field empty if you want WordPress on your main domain.
However, enter a directory when you want a subdirectory installation,
such as example.com/blog/.
Does Installing WordPress Replace My Existing Website?
It can overwrite or conflict with existing files if you select the same location. Therefore, check the destination carefully. Also, create a complete backup before starting the installation.
Can I Install More Than One WordPress Website?
Yes, if your hosting plan supports the required websites, databases, and resources. Give each WordPress installation its own location. In addition, use a separate database for each website when possible.
Are cPanel and WordPress the Same Thing?
No. cPanel helps you manage files, databases, domains, and other hosting features. WordPress, meanwhile, helps you manage pages, posts, themes, and plugins.
Does Installing WordPress Automatically Add My Site to Google?
No. The installation process creates your WordPress website. However, search engines must discover and index its pages separately. Therefore, review your visibility settings and submit your sitemap after launch.