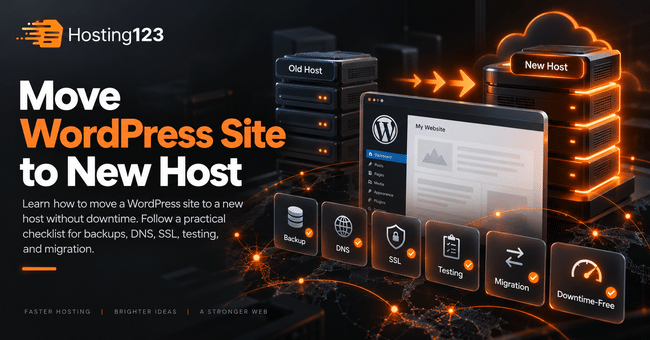
To move WordPress site to new host without downtime, copy your files and database first, test the site on the new server, update DNS only after everything works, and keep the old hosting active during propagation. Hosting123 recommends using a planned migration checklist instead of moving your site in a rush.
Quick Answer: How Can You Move WordPress Without Downtime?
You can move a WordPress site without downtime by preparing backups, migrating files and database, testing the new hosting environment, and changing DNS only after the new copy works.
However, timing matters. You should not cancel the old hosting immediately.
In short, keep both hosts active until DNS fully points to the new server.
Why WordPress Migration Needs Planning
WordPress migration looks simple at first.
You move files, export the database, import it on the new host, and update DNS. Yet one small mistake can break pages, images, forms, login, or checkout.
Therefore, planning matters more than speed.
A safe migration protects your website, email, traffic, SEO, and customer experience.
WordPress Migration Without Downtime: Overview
Use this table before starting the migration.
| Migration step | What to do | Why it matters |
|---|---|---|
| Backup | Save files and database | Protects your site before changes |
| New hosting setup | Prepare PHP, database, SSL, and panel | Reduces setup errors |
| File transfer | Move WordPress files | Keeps themes, plugins, and uploads |
| Database transfer | Move WordPress content and settings | Preserves posts, pages, and users |
| Test site | Check the new copy before DNS change | Prevents visible errors |
| DNS update | Point the domain to the new host | Sends visitors to the new server |
| Final check | Test forms, SSL, login, and pages | Confirms the site works properly |
This table gives you a simple migration path. As a result, you reduce downtime risk before changing DNS.
1. Take a Full Backup First
Start with a full backup before you touch anything.
You need a copy of your WordPress files and database. In addition, save your email settings, DNS records, SSL details, and hosting panel information.
Your backup should include:
- WordPress core files
- Themes
- Plugins
- Uploads folder
- Database
- wp-config.php file
- Email accounts
- DNS records
This step protects you if something goes wrong. Also, it gives you a safe rollback option.
2. Choose the Right New Hosting Plan
Before moving your website, make sure the new host can handle your WordPress site.
A small blog does not need the same resources as a WooCommerce store. Likewise, a business website with many plugins needs more stability than a simple landing page.
Check these hosting features:
- Current PHP versions
- MySQL or MariaDB support
- SSL support
- SSD or NVMe storage
- LiteSpeed or strong web server support
- Backup options
- Email support
- Migration help
For WordPress-focused websites, you can review Hosting123’s WordPress Hosting plans.
3. Prepare the New Hosting Environment
Do not update DNS yet.
First, prepare the new hosting account. Create the database, check PHP version, upload files, import the database, and review basic settings.
Also, compare the new server settings with the old hosting environment.
Check these items before testing:
| Server item | What to check |
|---|---|
| PHP version | Match WordPress and plugin requirements |
| Database | Create database and user correctly |
| File permissions | Keep WordPress folders readable and secure |
| SSL | Prepare HTTPS before launch |
| Cache | Configure cache after the site works |
| Recreate required mailboxes if needed | |
| Cron jobs | Add scheduled tasks if your site uses them |
This preparation helps your new WordPress copy work correctly before visitors arrive.
4. Move WordPress Files
Next, move your WordPress files to the new hosting account.
You can use FTP, SFTP, hosting file manager, or a migration tool. However, always confirm that the upload includes important folders.
Pay special attention to the wp-content folder. It contains your themes, plugins, and media uploads.
Also, keep the wp-config.php file safe. You may need to update database name, username, password, or host values.
5. Move the WordPress Database
WordPress stores posts, pages, users, plugin settings, menus, and many theme settings in the database.
Therefore, database migration is critical.
Export the database from the old host. Then import it into the new database on the new host.
After that, update the database connection details in wp-config.php.
If the domain stays the same, you usually do not need to change URLs. However, test the site carefully before DNS changes.
6. Test the Site Before Changing DNS
Testing before DNS update is the key to avoiding downtime.
Most hosting providers allow preview access, temporary URLs, or hosts file testing. Use one of these options to check the new copy.
Test these areas:
- Homepage
- Blog posts
- Images
- Menus
- Contact forms
- WordPress admin login
- Plugin pages
- WooCommerce checkout
- Search function
- Mobile layout
In addition, check browser console errors and broken image paths. Small issues are easier to fix before visitors use the new server.
7. Lower DNS TTL Before Migration
DNS TTL controls how long DNS records stay cached.
If you lower TTL before migration, DNS changes can spread faster later.
Do this at least several hours before the move if possible. For some domains, earlier planning works better.
After the migration finishes, you can raise TTL again.
This step does not move the website by itself. However, it helps reduce the transition window.
8. Update DNS Only After Testing
Do not update DNS until the new WordPress copy works.
Once testing looks clean, update your domain’s A record or nameservers according to your new hosting setup.
Then keep the old hosting active during DNS propagation.
Some visitors may still reach the old server for a while. Because of that, do not delete files or cancel the old plan immediately.
9. Check SSL After DNS Change
After DNS points to the new server, test SSL.
Your website should load with HTTPS without browser warnings.
Check these URLs:
- Homepage
- Login page
- Contact page
- Main service page
- Product page
- Checkout page
If you see mixed content warnings, update insecure image, script, or stylesheet links.
A working SSL setup protects trust and prevents browser security errors.
10. Test Forms, Email, and Checkout
Migration does not end after the homepage loads.
You also need to test important actions.
Send a test contact form. Log in to WordPress admin. Check password reset email. If you run WooCommerce, test cart and checkout.
Also, confirm email routing if your domain uses business email.
This final test helps you catch hidden problems before customers report them.
Zero-Downtime WordPress Migration Checklist
Use this checklist before, during, and after the move.
- Take a full file and database backup.
- Save DNS and email records.
- Set up the new hosting account.
- Create the new database.
- Move WordPress files.
- Import the database.
- Update
wp-config.php. - Test the site before DNS change.
- Lower DNS TTL if possible.
- Update DNS after testing.
- Keep old hosting active.
- Test SSL, forms, login, and checkout.
This checklist can stand alone as a migration plan. Also, it helps you avoid the most common WordPress migration mistakes.
Common WordPress Migration Mistakes
Many downtime problems come from small errors.
Avoid these mistakes:
- Canceling old hosting too early
- Updating DNS before testing
- Forgetting database import
- Missing the uploads folder
- Ignoring email records
- Skipping SSL checks
- Not testing forms
- Moving during peak traffic
- Forgetting cache cleanup
- Not keeping a rollback backup
As a result, your migration becomes safer and more predictable.
Should You Move WordPress Yourself or Get Help?
You can move a WordPress site yourself if you understand files, databases, DNS, SSL, and email settings.
However, many business owners prefer migration support because mistakes can create downtime.
If your website brings leads, sales, or customer requests, assisted migration usually makes more sense.
If you already have a website, Hosting123’s free website migration service can help you move your WordPress site more safely.
What About WooCommerce Migration?
WooCommerce migration needs extra care.
Orders, customers, carts, payment settings, product images, and email notifications must work correctly after the move.
Therefore, choose a low-traffic time and avoid taking new orders during the final sync if possible.
After migration, test:
- Product pages
- Cart
- Checkout
- Payment gateway
- Order emails
- Customer login
- Coupon codes
Final Decision: How Do You Move WordPress Safely?
To move WordPress safely, do not rush the DNS change.
First, back up everything. Then prepare the new hosting account, move files and database, test the site, and only then update DNS.
In addition, keep the old hosting active until you confirm that visitors, forms, SSL, email, and checkout work correctly.
In conclusion, zero-downtime WordPress migration depends on planning, testing, and timing.
Frequently Asked Questions
Can I move a WordPress site to a new host without downtime?
Yes. You can reduce or avoid downtime by copying the site first, testing it on the new host, updating DNS only after testing, and keeping the old hosting active during propagation.
What should I back up before moving WordPress?
Back up your WordPress files, database, uploads folder, themes, plugins,
wp-config.php, DNS records, email settings, and SSL details
before migration.
How long does WordPress migration take?
A standard WordPress migration may take a few hours. However, DNS propagation, email setup, large files, or WooCommerce data can add more time.
Should I use a free migration service?
Yes, if your provider offers a clear migration scope, backups, DNS guidance, SSL checks, and post-migration testing. This can reduce mistakes and downtime risk.